
Are you interested in starting a business on Amazon and looking for a comprehensive guide to creating an Amazon seller account?
In this article, I will share the required documents and provide a step-by-step guide to creating an Amazon seller account. Don’t worry; creating an Amazon seller account is easier compared to other e-commerce marketplaces like Walmart.
Just follow all the steps properly and enter the correct information, and you’ll get your Amazon seller account approved within 72 hours. Sounds impressive? Let’s get started!
Important Considerations Before Creating an Amazon Seller Account
If you want to start a business on Amazon, you must adhere to their policy guidelines. Breaking any of these rules can lead to a permanent suspension of your Amazon seller account, so you need to be mindful of a few key points.
Creating Multiple Accounts
You can’t create multiple accounts on Amazon without prior approval. If you want to create additional accounts, you must contact Amazon support before doing so. If you’ve already created an Amazon seller account, do not attempt to create a second one without permission.
Providing Accurate Information
When you start the sign-up process, follow every step carefully. Enter only accurate information and documents before proceeding to the next steps. You can’t go back to correct information once it’s submitted.
Valid Documents
You must have valid, up-to-date documents. Amazon does not accept any invalid or outdated documents.
Prepare for Video Call Verification
Amazon support may request a video call to verify your identity and documents. Be prepared for this and have all the necessary documents physically on hand. They may ask you to show your ID during the video call.
Required Documents and Information to Create an Amazon Seller Account
Amazon will ask for a few necessary documents to start your business on their marketplace. The great thing is that by creating a single Amazon seller account, you can do business globally wherever Amazon provides its services.
Amazon requires the following 11 pieces of information and documents:
- Your Name: Make sure the name matches exactly with all your documents.
- Email Address: Provide your best email contact as changing it later can be difficult and may require account re-verification.
- Phone Number: Provide a reliable phone number for emergency contact regarding your seller account.
- Address: Submit a personal or business address. Changing this address later will require re-verification.
- Return Address: Provide a customer return address, which can be the same as your account address. you can change it later easily.
- Business Documents: Submit your business info and documents. Register your business with state or federal authorities if you haven’t already.
- Government-Issued ID: Provide a scan of your government-issued ID, passport, or driving license.
- Active and Chargeable Debit/Credit Card: Set a billing method for Amazon to charge fees and costs if your account exceeds available funds.
- Recent Bank Statement: Submit a PDF of your recent bank statement.
- Tax Information: Share your personal or business tax information.
- Bank Account: Provide bank account details for fund transfers from Amazon. Use only the personal or business bank account details you used to create your seller account.
Choose Your Amazon Selling Plan
There are two plans for sellers. Choose one to become a seller on Amazon:
- Individual: Charges $0.99 per item sold. Suitable if you have low inventory and don’t expect many sales.
- Professional: Charges $39.99 per month, with no per-item fee. Ideal if you have bulk inventory and expect many sales, saving you money.
| Feature | Individual Plan | Professional Plan |
|---|---|---|
| Subscription Fee | $0.99 per item sold | $39.99 per month |
| Tools and Services Included | ||
| – Access Seller University trainings and Help pages | Yes | Yes |
| – Get help from Seller Support | Yes | Yes |
| – List products one at a time | Yes | Yes |
| – Manage inventory one product at a time | Yes | Yes |
| – Manage seller-fulfilled orders | Yes | Yes |
| – Set static prices | Yes | Yes |
| – Use tools like the Revenue Calculator, Amazon Seller App, and Service Provider Network | Yes | Yes |
| – Add multiple users to your account | No | Yes |
| – Apply to sell restricted products | No | Yes |
| – Build your brand with enhanced product pages, a digital store, and other tools | No | Yes |
| – Compete to be the Featured Offer | No | Yes |
| – Create promotions and coupons | No | Yes |
| – Integrate selling apps with SP-API | No | Yes |
| – List products in bulk | No | Yes |
| – Manage inventory in bulk | No | Yes |
| – Participate in programs like Global Selling, Local Selling, and Renewed | No | Yes |
| – Set dynamic prices | No | Yes |
| – Set your own shipping fees for non-media products | Yes | Yes |
| – Use B2B tools to engage business customers | No | Yes |
| – Use business reports to track sales, inventory, and orders | No | Yes |
| Access to Optional Programs | ||
| – Store inventory and ship customer orders using Fulfillment by Amazon (FBA) | Yes | Yes |
| – Advertise your products and brands using Amazon Ads | No | Yes |
| – Create Lightning and 7-Day Deals | No | Yes |
| – Get paid in your local currency with Amazon Currency Converter | No | Yes |
| – Level up brand protection with Transparency | No | Yes |
| – Participate in programs like Amazon Lending, Customer Service by Amazon, and Strategic Account Services | No | Yes |
| – Ship ocean freight with Amazon Global Logistics | No | Yes |
Step-by-Step Guide to Creating an Amazon Seller Account
When you’re ready with all the documents, proceed with the sign-up process. Here’s a detailed step-by-step guide:
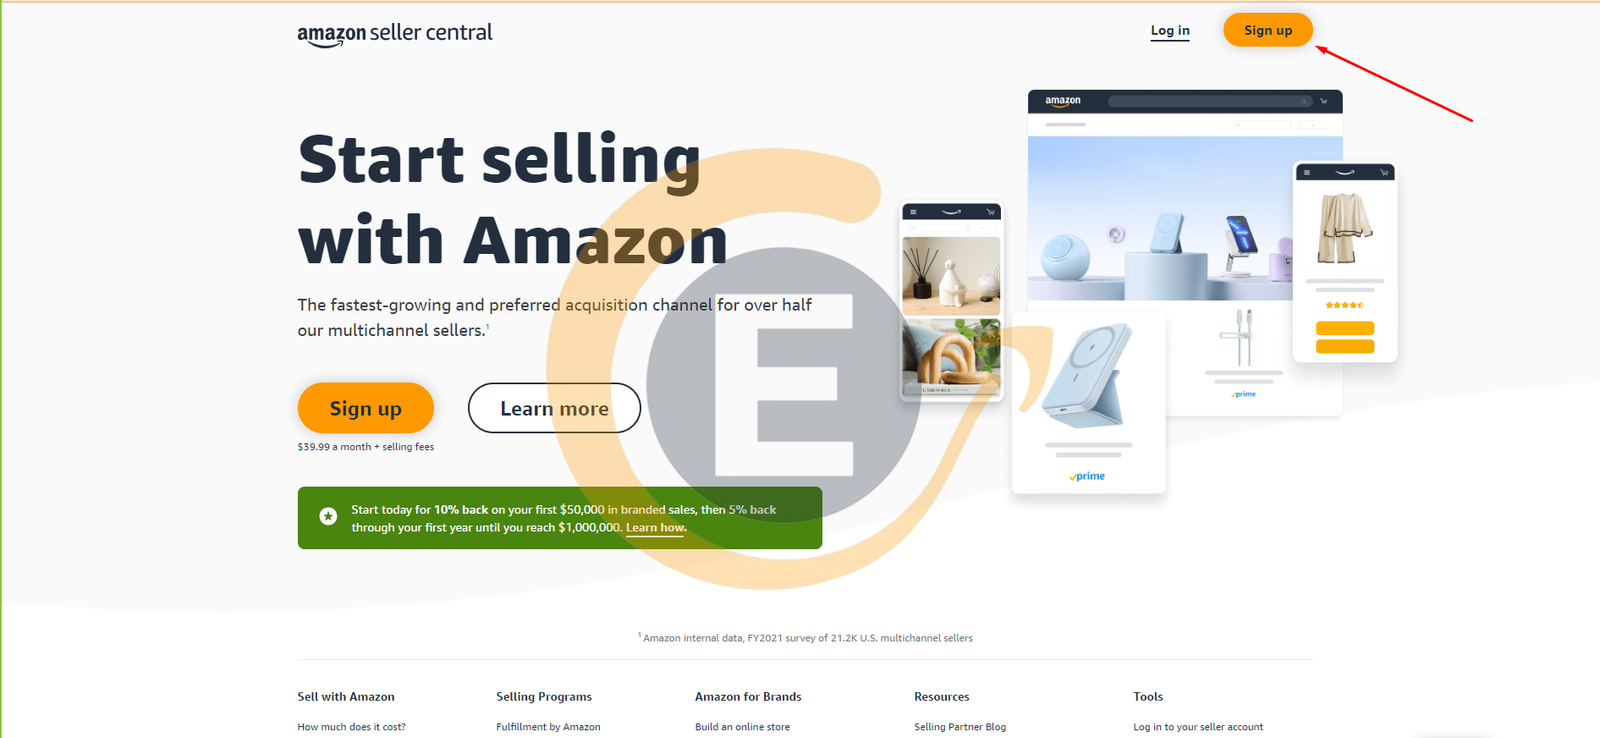
Step 1:
Go to the Amazon Seller Central website and click the “Sign Up” button.
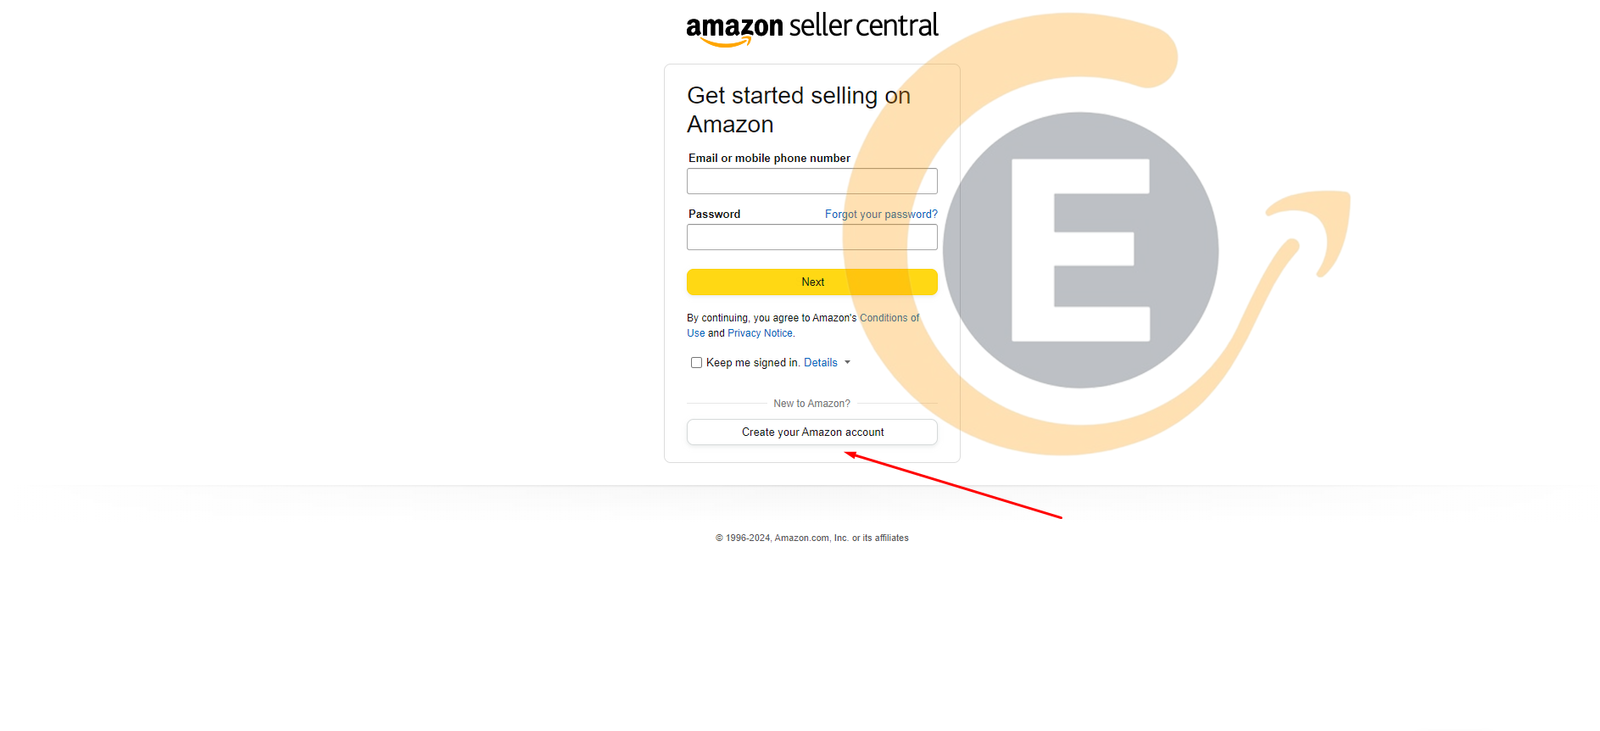
Step 2:
Log in with your existing Amazon buyer account or choose the “Create your Amazon account” button.
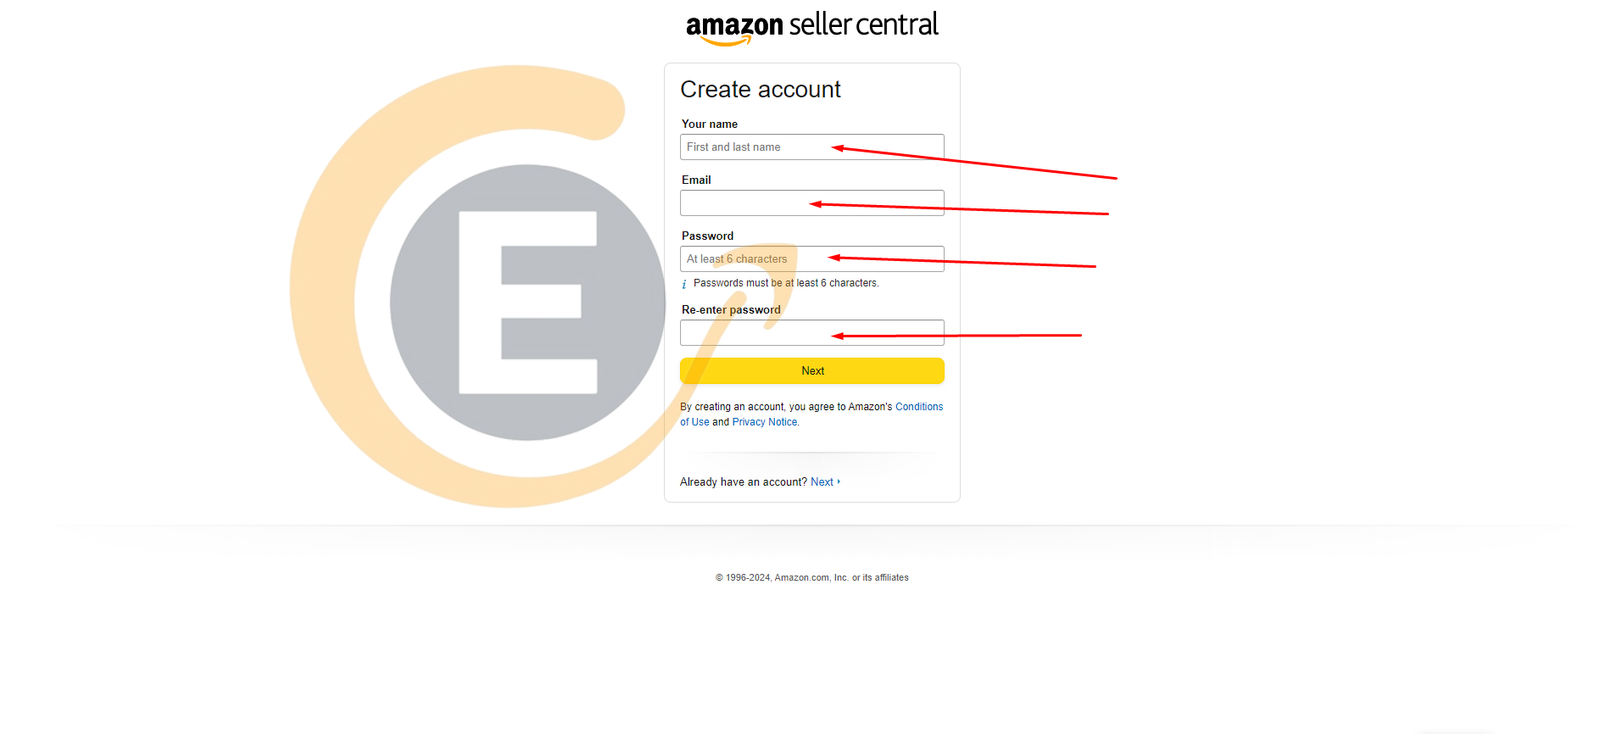
Step 3:
Enter your first and last name, email address, and password, and re-enter the password. Click the “Next” button.
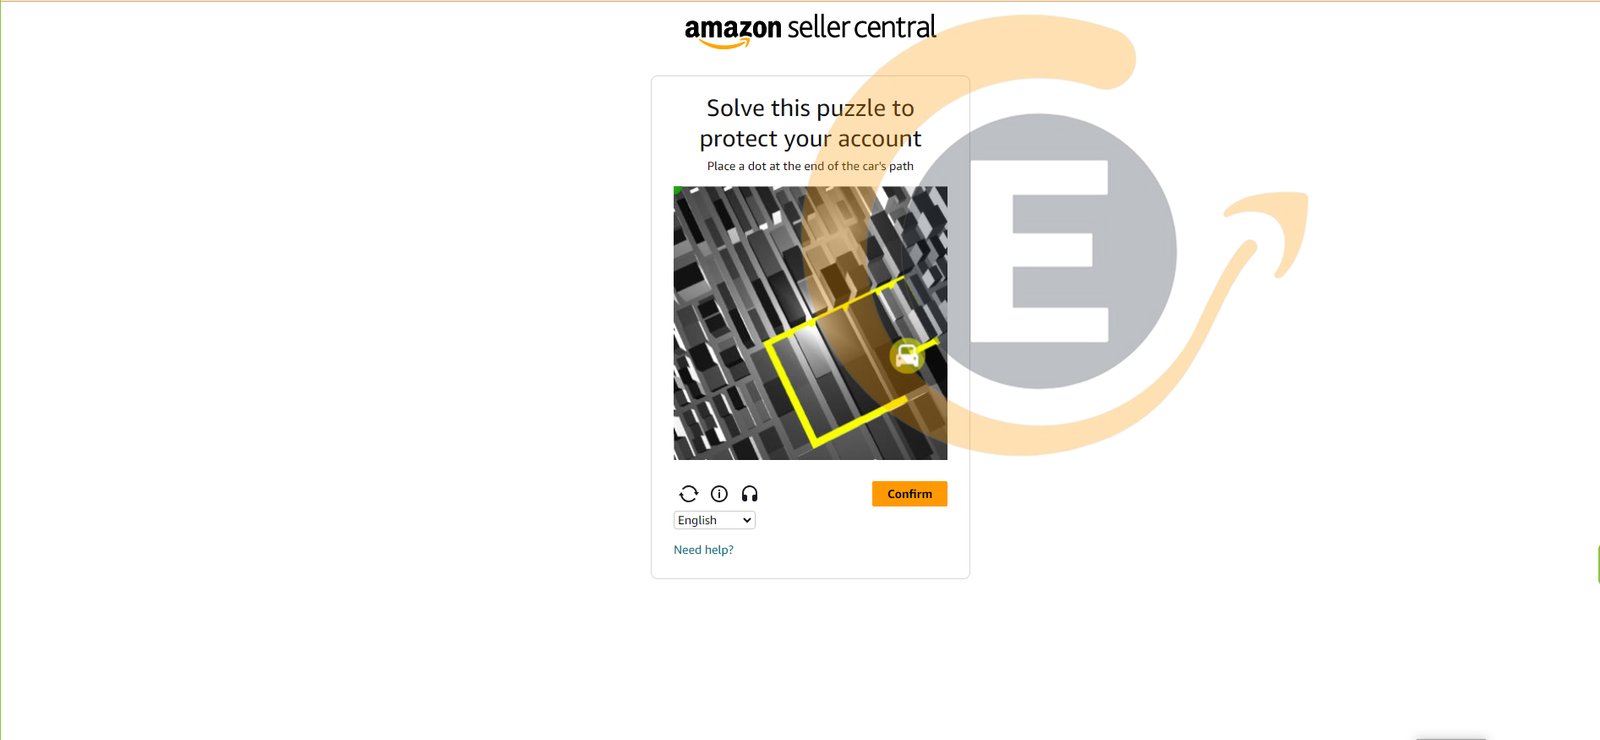
Step 4:
Solve a puzzle for human verification.
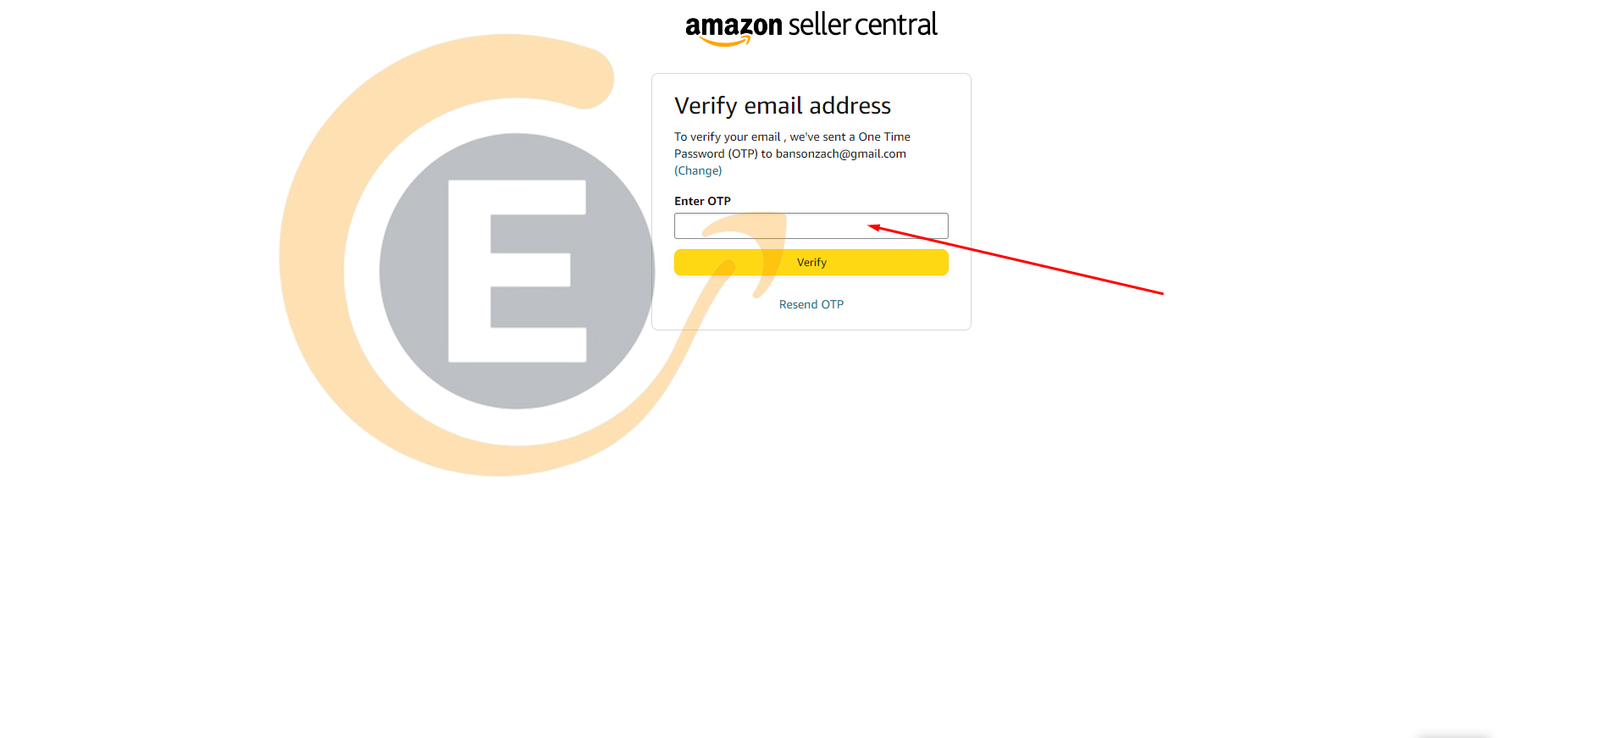
Step 5:
You will receive an OTP via email. Enter it and click the verify button.
Step 6:
You will receive an OTP via phone. Enter it and click verify.
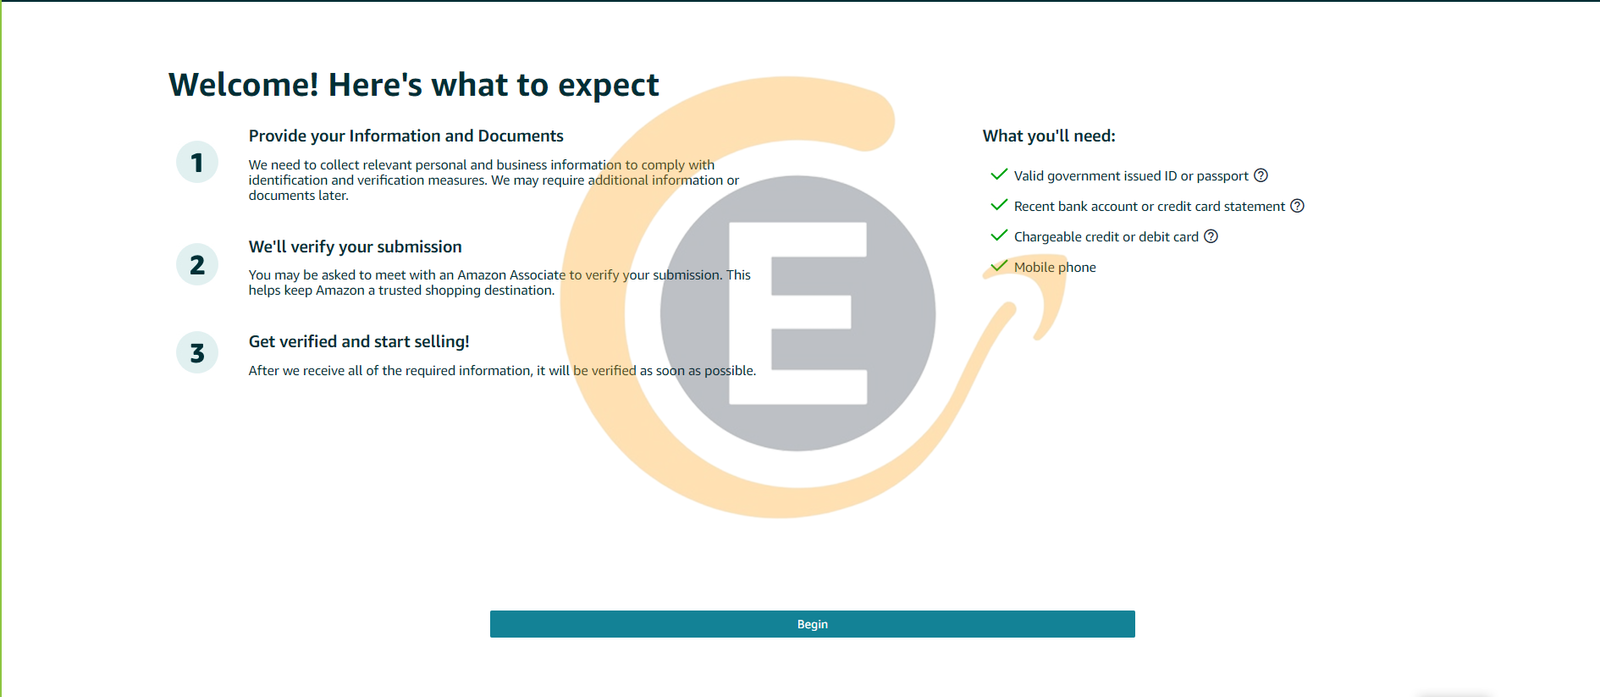
Step 7:
You will see a dashboard with information. Read it and click the “Begin” button.
Step 8:
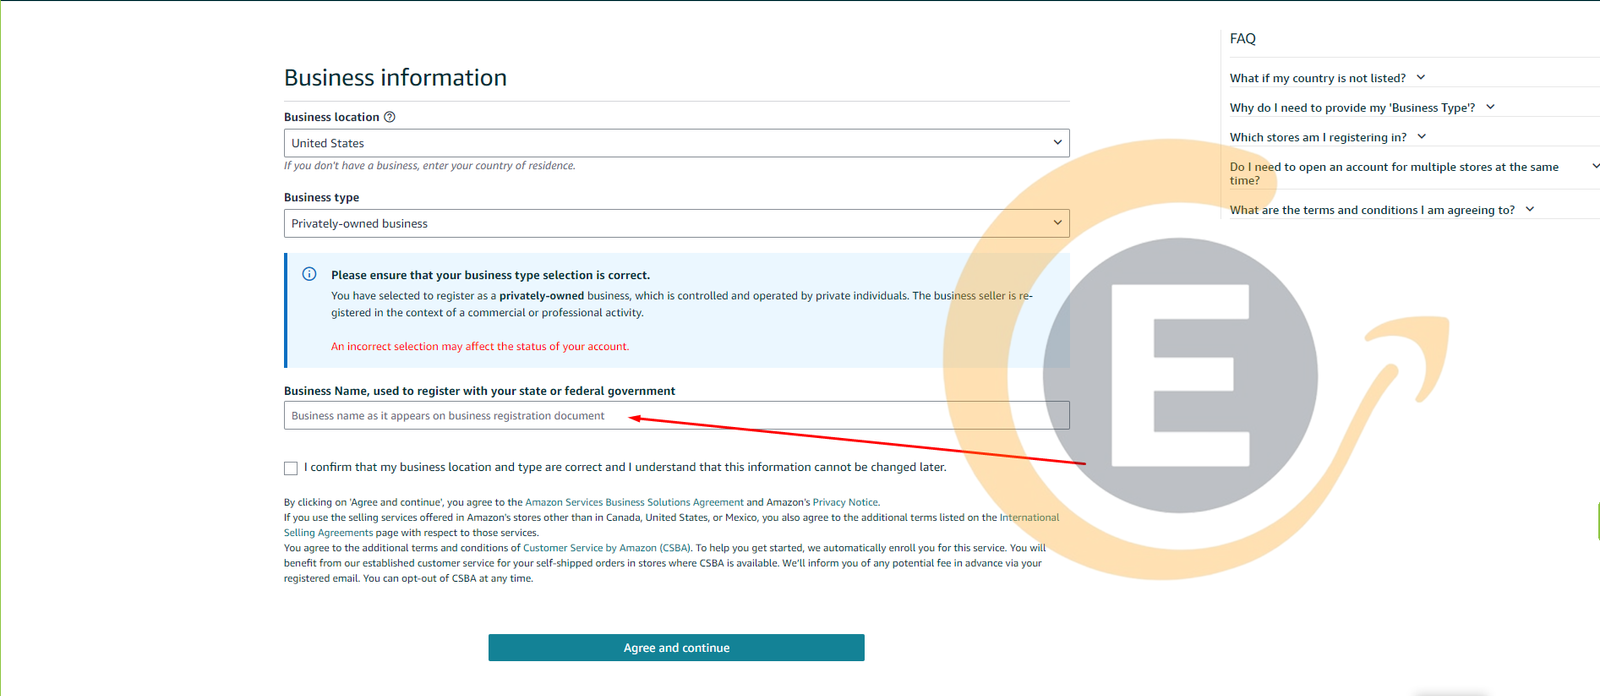
Select your business location, and business type, and enter your business name then Click “Agree and Continue.”
Step 9:
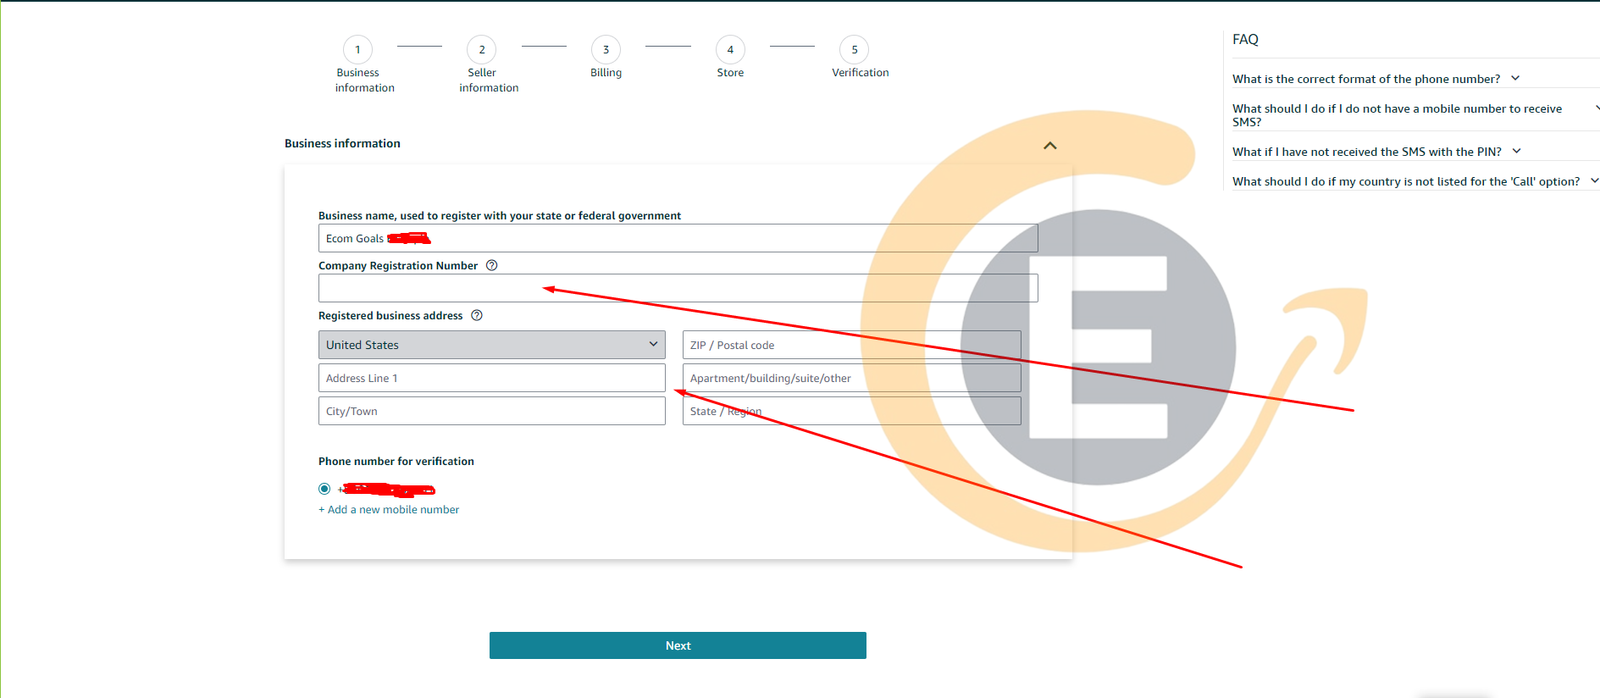
Enter your business registration number and business address, matching your business documents.
Step 10:
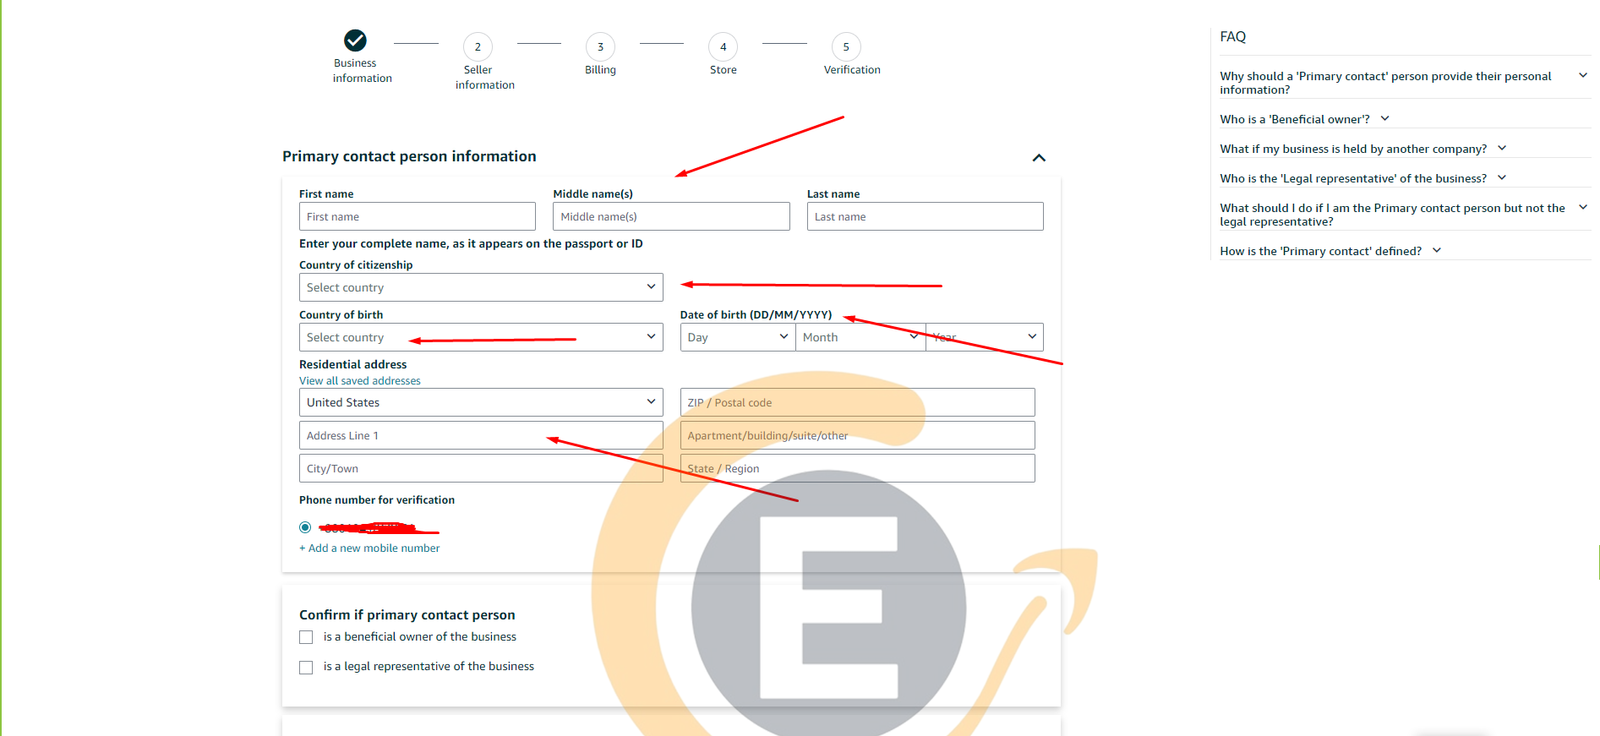
Enter your personal information, including name, country of citizenship, country of birth, date of birth, and residential address. Click the “Next” button.
Step 11:
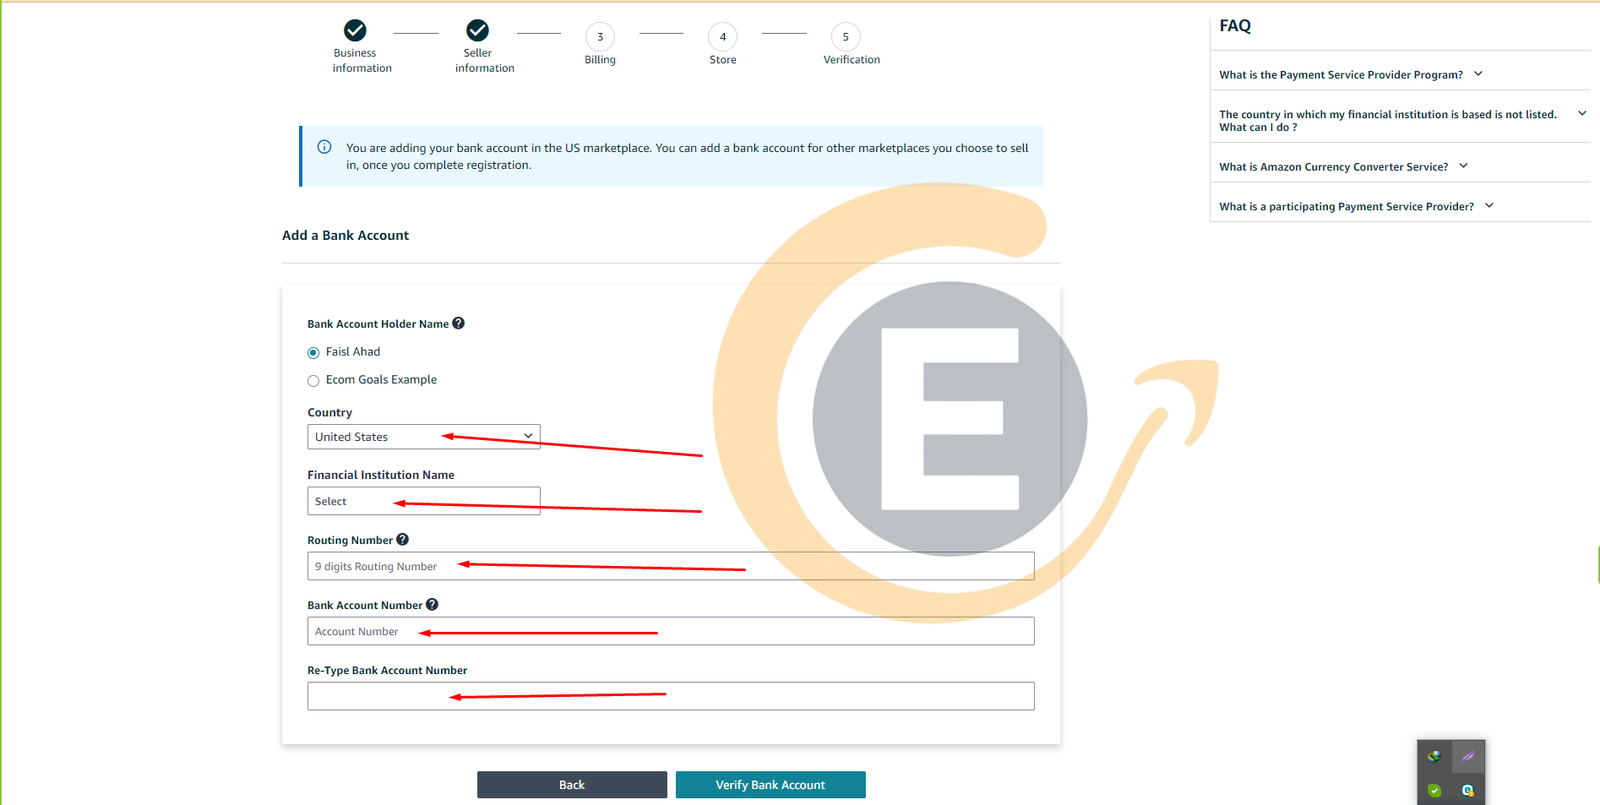
Enter your bank account details. You can use personal or business account information.
Step 12:
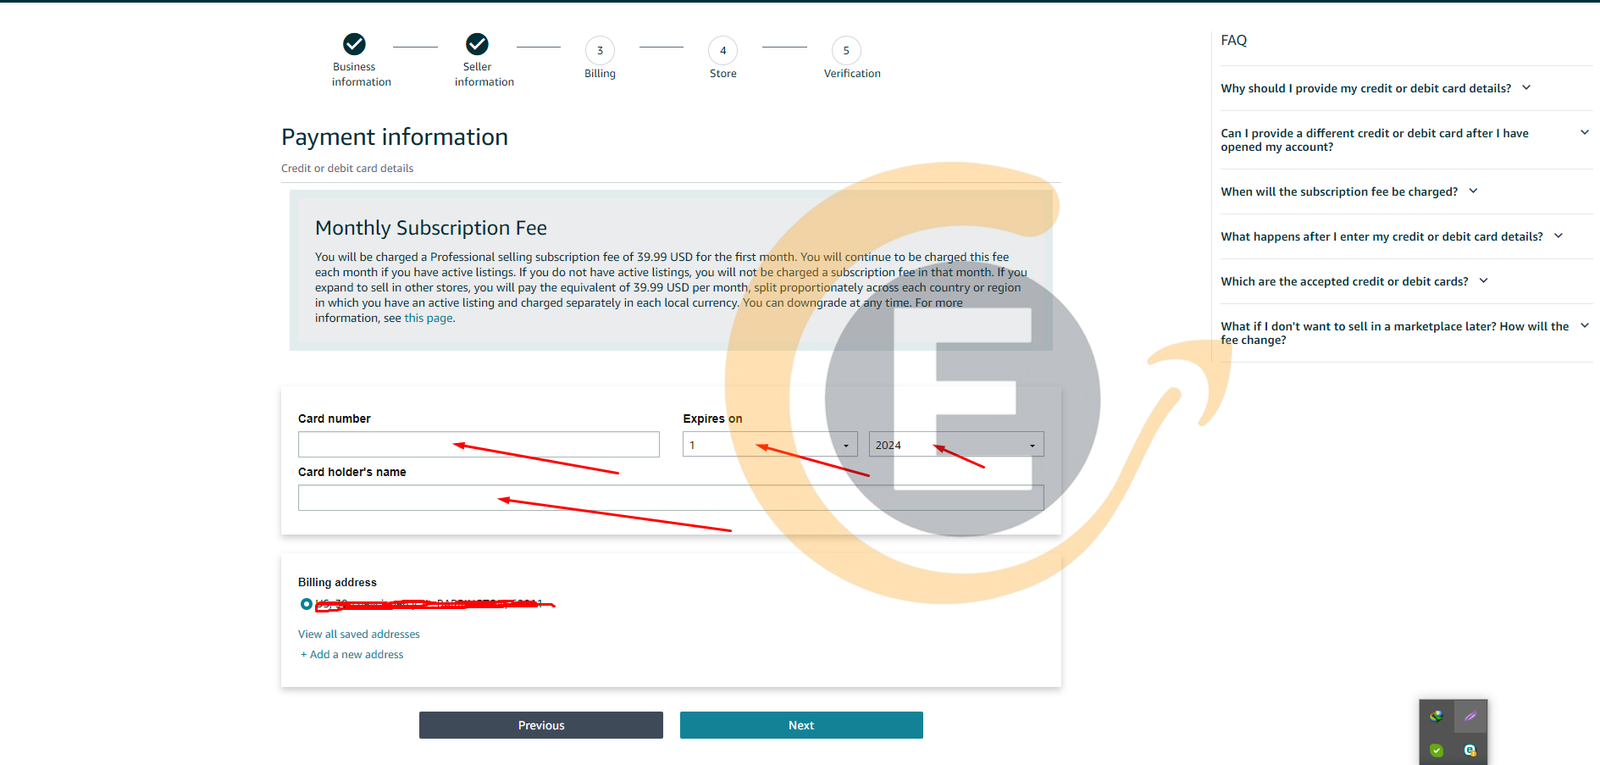
Enter Credit/Debit card information for Amazon to charge monthly fees and other expenses.
Step 13:
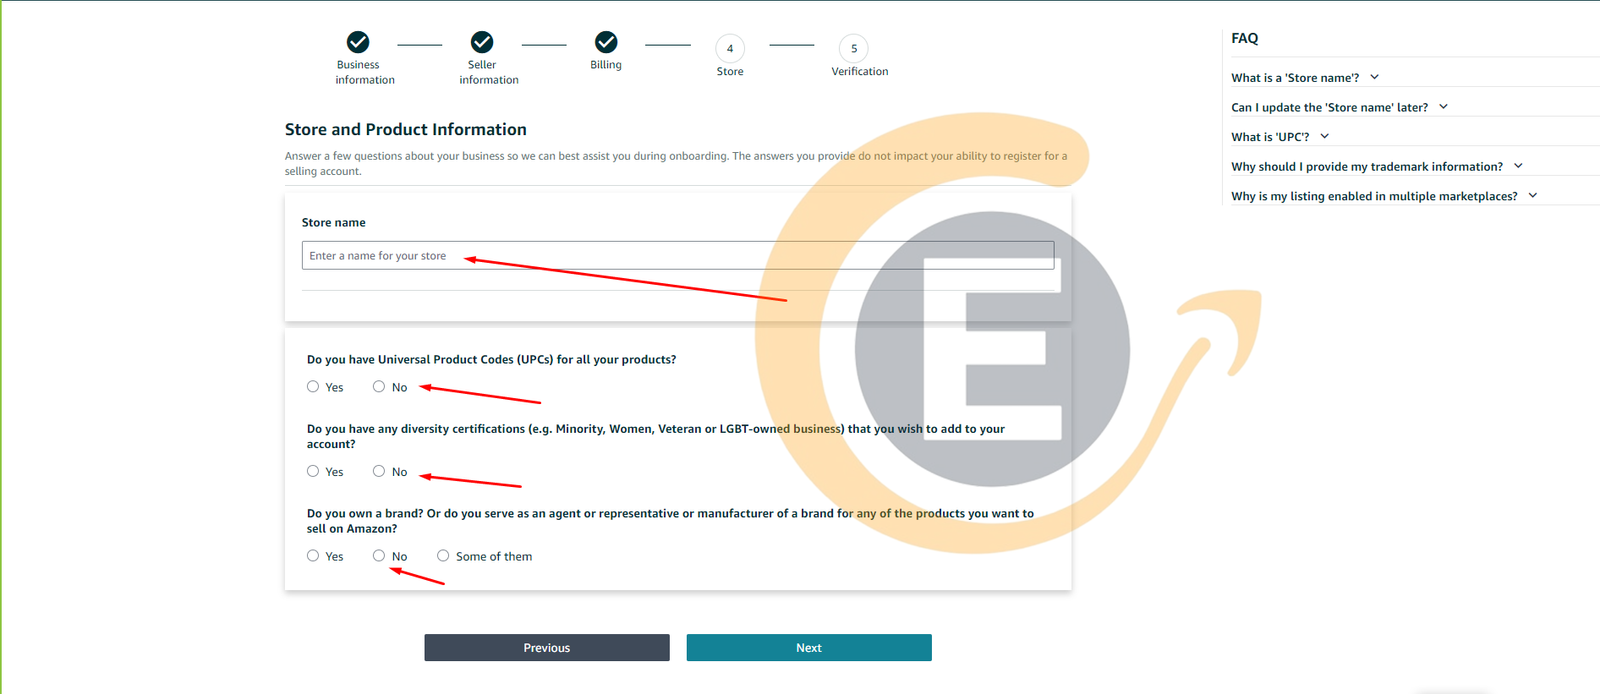
Enter your store information. You can change the store name later. Answer questions about your store. Click “Next.”
Step 14:
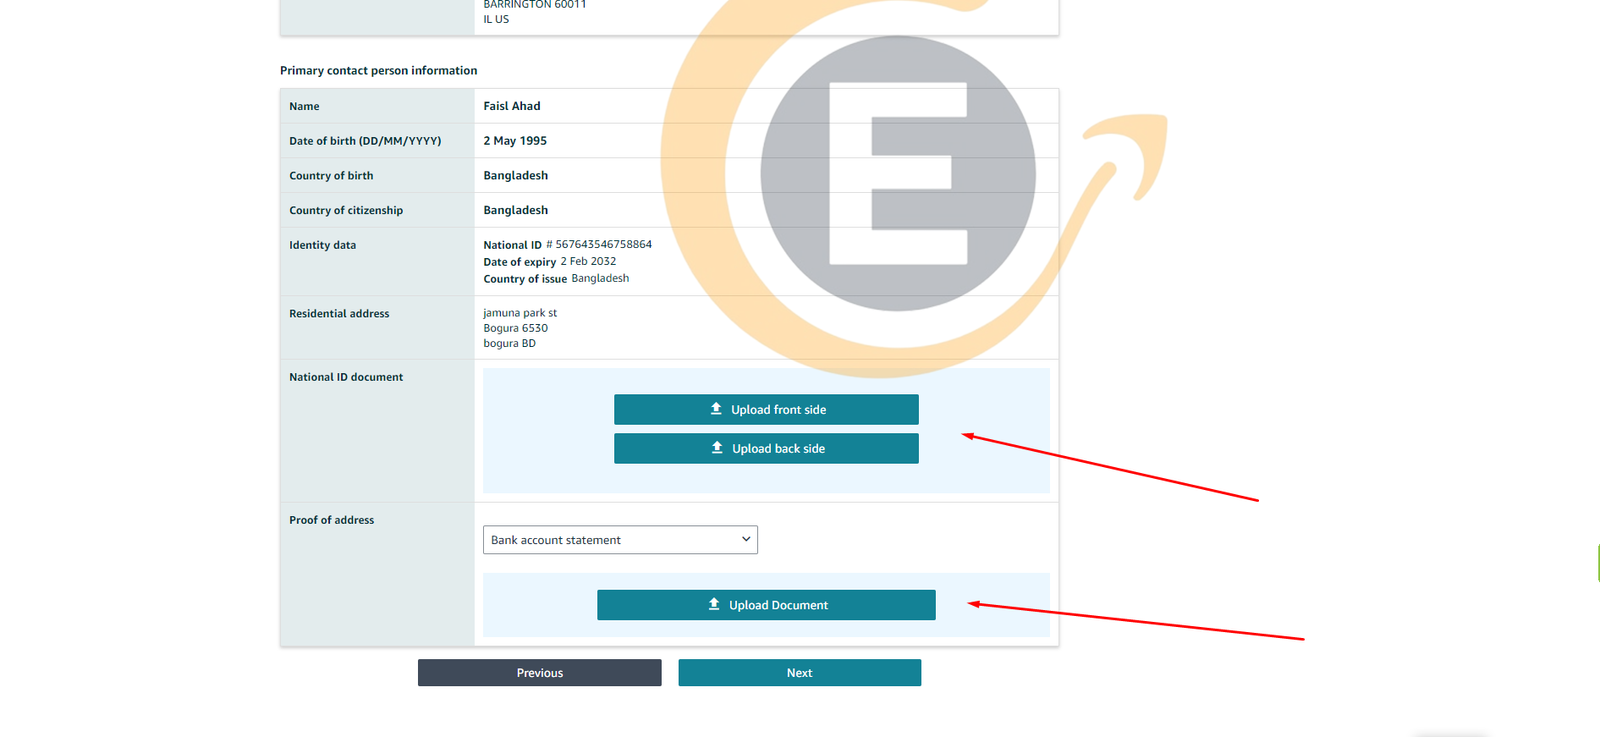
Review all information. Upload your ID documents and recent bank account statement. Click “Next.”
Step 15:
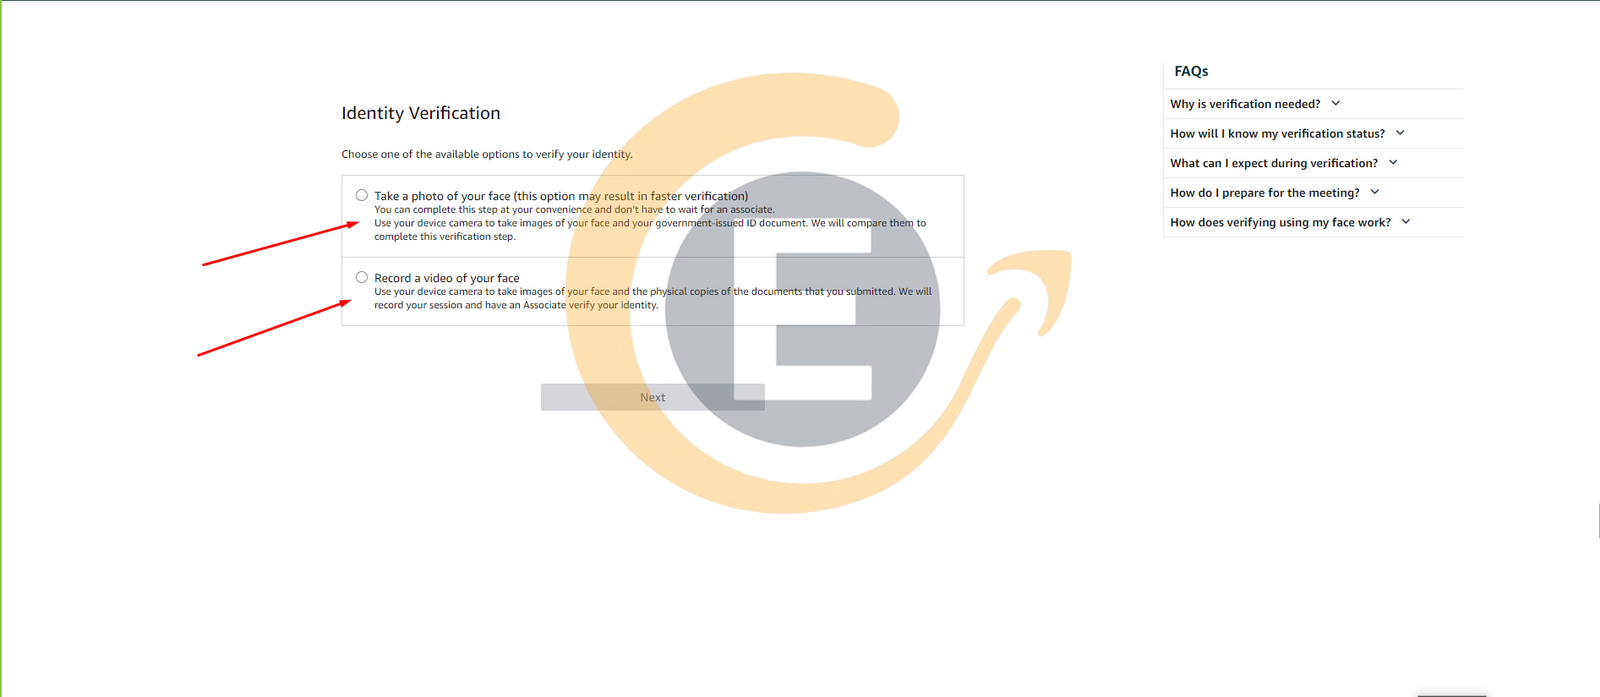
Verify your identity. Amazon may ask you to take a selfie, record a video with your ID, or join a video call with an agent.
After completing ID verification, Amazon will review your details within 72 hours and email you upon completion.
If all the information is correct, you’ll be approved to sell on Amazon.
Conclusion
Creating an Amazon seller account is straightforward if you follow the steps correctly. Based on my experience, Amazon allows anyone to sell their products on their marketplace, regardless of whether you’re a beginner or an expert in the e-commerce business.

Hello, I am an E-commerce Expert with extensive experience providing services to numerous e-commerce brands and individuals since 2017. My primary areas of expertise include the Amazon, Walmart, and Shopify marketplaces. Linkedin